Cold batteries with warm central heating pipes indicate that it is time to change them. Heating radiators become clogged over time, and the question becomes how to properly install a heating radiator in an apartment. If earlier this required the skills of a welder and the services of public utilities, today many fittings and couplings make it possible to do this yourself.

DIY radiator installation
Content
- 1 Which heating radiators to choose for replacement
- 2 How to start the installation of heating appliances
- 3 Placement and layout tips for radiator brackets
- 4 Features of connecting a radiator in a single pipe heating system
- 5 Additional heating control options
- 6 Complete set and assembly of the purchased battery
- 7 Work stages
Which heating radiators to choose for replacement
Not everyone will undertake the installation of heating radiators on their own, considering this venture too troublesome. But in fact, the main front of the work is not so complicated.
With the huge variety of thermal equipment that is offered today, it can be difficult to choose the right option. However, you should familiarize yourself with all the characteristics, and not just look at the design and description of the model.

Aluminum radiators have the highest heat dissipation
In general terms, the parameters are as follows:
- With the greatest heat transfer - aluminum radiators, characterized by maximum heat conductivity, excellent design. Among the "cons" you can specify the susceptibility to destruction from the acidic medium of the coolant, it is undesirable to use them in urban skyscrapers, where there is high pressure up to 20 atmospheres.
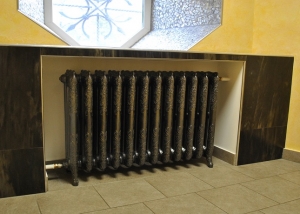
- Cast iron radiators are durable due to their resistance to corrosion and clogging by heavy particles. Among the shortcomings is an outdated design, a large mass that makes it difficult to transport and fasten the cast-iron battery to the wall with decor. Cracks from water hammer are possible because the material is not plastic.
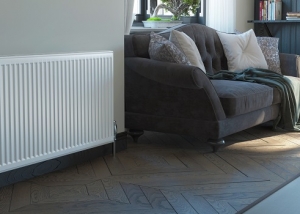
- Steel radiators are also characterized by high efficiency in heat transfer, they have an affordable price, excellent design, visually compact dimensions even with a large length and depth. Their “minus” is the susceptibility to corrosion, even if the documentation indicates “stainless” steel. With a small thickness, they are subject to deformation from water hammer and excessive pressure in the system.
- Bimetal radiators (coated aluminum and steel pipe inside) are distinguished by their superior design and heat dissipation, and with low weight. Corrosion resistance is ensured by internal spraying; they are undemanding to acid-base environment and coolant contamination. The system tests are well tolerated, there is the possibility of adjusting the heat supply with additional equipment. Among the shortcomings is the high cost relative to other modern batteries.
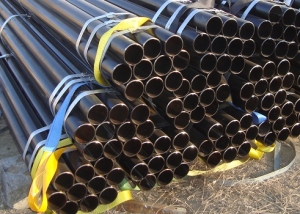
- Copper pipes and radiator sections have the longest service life - up to 50 years. In Europe they are considered the ideal option. Among the "cons" you can specify the highest cost and complex installation due to special soldering, which is done only by specialists.

Bimetallic radiators have an excellent design and good heat dissipation
Important! Thermal equipment is selected according to a combination of properties. Most often, cast iron batteries are dismantled, preferring bimetal and communications from metal-plastic pipes. This makes sense for a general replacement of the entire heating system.
The jumper between the battery tubes is an important element of the system. It is able to soften water hammer, thanks to the additional distribution of the coolant by the riser and bypass.
How to start the installation of heating appliances
It is better to engage in the replacement of heating appliances in the summer, when it is not necessary to turn off the heat supply in the entire entrance or house. In any case, you will need the “goodness” of the housing office serving this site. Only they have the right to block and seal the hot water supply system.

Connection diagram for heating radiators
Before installing a heating radiator and dismantling old equipment, it is important to obtain permission from specialized specialists. Independent dismantling and changing the circuit of heating equipment threatens with large fines and turning off the heating in the apartment.
The next step is to identify the mounting points of the brackets. Before installing a bimetallic radiator, it is recommended to determine the best place. In urban apartments, the coldest place is the window sill and slots of the balcony door, in the private sector - the front door without a porch. Therefore, if it seems that one battery is not enough, it is recommended to duplicate it near a cold wall or at the door.
Helpful advice! Even if there are no places except a niche under the window where cold air slides, it is advisable to position the heating radiator exactly in the middle. This will ensure the most complete heating of the cold masses in the winter, and warm air will be fully distributed in the room.
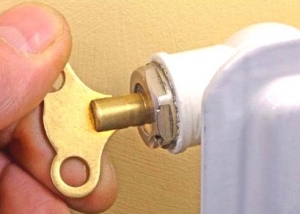
To release air from the system, a Mayevsky crane is installed. Therefore, it is important to provide for it in the free upper hole (collector) of the radiator. It is especially recommended to place it at the end point of the circuit on the top floor.

Mayevsky crane
Placement and layout tips for radiator brackets
The marking of the place for the brackets requires accuracy - it is important to align the horizontal and vertical in order to avoid tilting. If the installation is carried out according to the correct marking, this will extend the life of the radiator. It will become less clogged and airy - there will be no elevated corners and places for mud sediment and rust.
It is important! First, they are mounted on the wall of the bracket on dowels (2 or 4), before installing an aluminum heating radiator (or another type). Their location is marked with chalk after determining the points according to the universal building level (or other devices).

Marking the space for brackets requires accuracy
Modern cast-iron models have legs to lighten the weight on the wall. It is up to the master to decide whether to make additional fastening to the wall for them, but it is better not to neglect such an opportunity. A multi-sectional battery must be fixed with at least 6 brackets. A special approach requires the installation of thermal units in banked old houses, where the horizontal window is broken. The batteries will have to be aligned horizontally, but this will most likely not match the level of the windowsill. It is better to hide the difference in levels with blackout curtains. But the axis of symmetry of the window sill and the battery must be the same to ensure uniform heating.
When connecting heating radiators, the pipe wiring can be slightly tilted (0.3 - 0.5 cm per 1 m of pipe) to the source of hot water. It is recommended to observe the distance to the wall surfaces (3-6 cm), floor (5-10 cm) and window sill (10-15 cm).
Features of connecting a radiator in a single pipe heating system
The concept of "one-pipe scheme" eloquently speaks about itself - summing up eliminates parallel installation. The choice of circuits is due to many factors, but this does not affect the efficiency of heat supply.

Single pipe heating system diagram
The supply of heat in a single pipe circuit is carried out in different ways.For example, in a series connection of heating batteries, the pipe passes from one heater to the next, closing the circuit on the boiler. Or goes to the central heating riser, where the water warms up again. Simple installation is the only plus, but an almost cold coolant returns to the boiler, which is not enough to heat large houses and remove it from the boiler at a great distance.
Important! The disadvantage of this circuit can be considered the inaccessibility of turning off one of the radiators if a leak, airing or clogging occurs. The temperature regulator will work on the whole circuit, without the ability to make the coolant in steel tubular or cast-iron batteries warmer or colder.
Some heaters are thought out taking into account the fact that different inputs and outputs are designed for the entrance and removal of the coolant. This should be described in the technical documentation. Then the supplied jet will be distributed differently, creating a reverse current or spraying inside the radiator tank. In some cases, this is not so important, for example, with a saddle (lower) connection. Saddle connection in single-pipe schemes is a good opportunity to turn off each heat unit individually.

Ways to connect heating radiators
It’s good when there is a drawing in the description of the model that clearly explains how this thermal unit is connected. It is recommended to clarify the installation rules and all the nuances regarding the connection method recommendations before buying a battery:
- lower;
- side;
- diagonal.
Attention! It is convenient when with one-way connection with the use of a bypass (a jumper between the inlet and outlet pipes) with a water hammer, the load on the batteries decreases. During operation, this reduces heat loss by about 15%.
In a two-pipe scheme, the heat transfer pipe and the “return” function separately. The main pipe passes to the side of the radiator, the lower fragment serves only for return. It’s more efficient in terms of operation, but double installation costs are assumed. The methods for connecting the pipes are about the same, but for installation it is better to use circuits so as not to get confused.

Thermostatic expansion valve allows you to save heat
Additional heating control options
Valves, regardless of the pipe circuit and the method of supplying the coolant to the radiators, are needed to quickly stop the leak or other emergency situations. Part of the communication or one heating device can be immediately turned off, preserving the property from flooding. When installing new heating equipment, be sure to install shutoff valves.
Thermostatic valves allow you to adjust the microclimate in the room and save on heating. In systems of the “smart home” type, which are becoming more accessible through the smartphone application:
- it is possible to turn off the heating in their absence;
- control the air temperature in the room;
- turn on the equipment before returning.
Complete set and assembly of the purchased battery
Most heating equipment is sold ready-made or prefabricated. They differ in high-quality soldering and fully complete assembly. And all that is needed for installation - fittings for connecting to pipes, are attached to them. Most often there is a description with all the recommendations for connection. For an open top hole, a Mayevsky cock is recommended to let out air accumulating in the coolant. It will not be superfluous instead of plugs, which anyway install on collectors not occupied by pipes.

Accessories for installing a heating battery
If the device for heating a room is sold without additional equipment, you will need:
- plugs (1 blind, 2 pass-through pipes) and gaskets for them;
- Majewski tap with thread (possibly with fitting);
- reinforced pipes made of polypropylene (metal-plastic, another polymer);
- "American" (valves of stop valves);
- trailer for connecting to neighboring batteries.
For the Leningradka and other schemes, cut-in valves distributing the coolant for more uniform heating are also recommended. In houses where payment is made according to the temperature level in the room, a heat energy meter is mounted near the riser.
When everything is available, it remains to collect the tools:
- pencil, square and tape measure for marking;
- universal building level;
- dowels and brackets;
- a special soldering iron for polymer pipes (many companies and shops rent);
- adjustable spanner and torque wrench (prevention of thread displacement and leakage);
- electric drill or universal tool for mounting brackets to the wall;
- a grinder with a disc for metal (for dismantling old batteries).
Attention! Some models can be grown by the number of sections, and this may be a priority when choosing new batteries. Most often, consultants at specialized stores tell you what additional parts and shut-off control valves are needed to shut off part of the system in an accident.

After installing the radiator, check all connections and tighten the nuts if necessary.
Work stages
The best time to replace equipment is summer. Sometimes you have to work during the heating season, then installation is carried out in an emergency mode, so as not to disconnect the riser for a long time.
- Before installing a heating radiator, it is necessary to shut off the coolant supply in your apartment, having agreed with the specialists of the housing office.
- Dismantling of old radiators with flanges, couplings and locknuts (must be removed if rusted, leaving part of the pipe with a thread).
- Cut pipes in convenient lengths and remove old batteries from the holders. Used brackets are best replaced by fixing in other places - most likely, the new radiator will be in a different format.
- We mark the level (exact vertical and horizontal) of the location of the new heating radiator. Its central axis and the middle of the window sill should coincide. We fasten the brackets to reliable dowels.
- The new model should be equipped with foot nuts with gaskets, eyeliners or pipes with ball valves. If they are not, it is advisable to add.
- The new radiator is placed on the holders, then you can let the pipes down. The segments of the desired size are connected to the battery and interconnected along the contour.
- Do not forget about shut-off valves and all necessary elements of the heating pipeline. Some joints can be welded, some are available for joining with fittings and couplings, especially on turning fragments.
- For tight joints, linen tow is used with impregnation of heat-resistant Unipak paste (or equivalent). Use a wrench to tighten. In the same way, mount the Mayevsky crane and plugs. Places with tow abundantly open with paint.

A correctly selected and correctly installed heating radiator is the key to warmth and comfort in your home
Upon completion of installation, check whether everything is done correctly. Perhaps minor flaws can be detected in the form of a leak at the start of the system, and for this you need a shut-off valve. All malfunctions are recommended not to be fixed with temporary clamps, but to be fixed thoroughly.