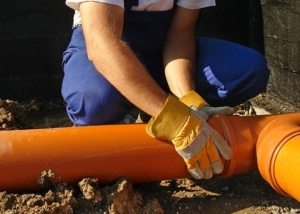
Fixing the drainpipes to the wall is one of the stages of the installation of the system, which effectively removes precipitation falling on the roof surface. If the roof gutter is installed after the roof has been mounted, then the gutters can also be fixed to the wall (on the frontal board, to the rafter leg, or to the crate) with brackets.

A drainpipe into which drains from roof gutters collect can be mounted on a wall
Content
What gutter system can be installed
When installing a drain, the owner of the house will have to make decisions:
- regarding the choice of form and materials from which it is made;
- the acquisition of a finished kit or assembly of individual elements, the number of which and the installation scheme will need to be calculated;
- invitations of third-party specialists or fulfillment in-house.
The gutter for the drain in shape can be:
- semicircular;
- rectangular;
- trapezoidal.
As a material for manufacturing, preference may be given to:
- copper or metal alloys (zinc and titanium, for example), characterized by durability, aesthetic appeal and high cost;
- galvanized steel. If earlier this material was practically the only one suitable for the manufacture of a sufficiently durable construction, now the situation is changing rapidly, and consumers have a choice. Nevertheless, despite the emergence of plastic structures, galvanized steel is still considered as the main material for the arrangement of drainage from the roof surface;
- plastic, usually polypropylene.

Gutter systems made of polymer materials are lightweight and quick to install
The advantages of choosing polypropylene pipes and fittings include:
- non-susceptibility to corrosion, which means the possibility of exploitation for half a century, a period absolutely unattainable for galvanizing;
- the ability to give plastic virtually any shape and color, which allows you to implement existing ideas regarding design decisions;
- the availability of proposals in the form of kits prepared for assembly, which can be installed independently when following the instructions.
It should be noted that the cost of acquiring such kits will be higher than in the case of purchasing all the required materials separately. But preliminary calculations of the required amount of consumables will fall on the shoulders of the building owner.
Note! The disadvantage of plastic pipes is their fragility in relation to the effects of temperature changes in the cold season, leading to intermittent freezing and thawing. Winter thaws are detrimental to plastic drainage systems, as they cause cracks in them.
Requirements for the fasteners of the drainage system
Selecting fasteners for downspouts, they are guided by two main indicators:
- the quality of products that are designed to ensure the reliability of the drainage system;
- the presence of a correspondence between the materials used for the manufacture of fasteners and those used to make the gutter, pipes and the entire drainage system from the roof surface as a whole.
The bracket holding the gutter is mounted, as usual, on the windshield of the roof. This option is considered as preferred in cases where:
- the installation of the gutter has to be performed after the roof has been installed;
- installation is carried out in the course of repair work on the roof surface;
- a polypropylene gutter is installed.

The type of fasteners for gutters and how to fix them depends on what the gutter system is made of and what surface it needs to be attached to
The presence in the design of the brackets of vertical ribs significantly enhances it, allowing you to cope with considerable loads. When installing a metal drain, it is customary to use special short hooks.
In the absence of a windshield in the roof structure, rafters are used to fix the gutters using brackets. This option is convenient if the roofing material has not yet covered the roof surface. It will require the use of combined brackets, the direct fixation of which to the surface of the rafter legs is carried out by means of steel extensions provided in the design. When installing the brackets on the rafters, the step between them is assumed to be no more than 600 mm, as ensuring sufficient reliability.
Good to know! If you no longer have access to the rafter legs, then thorough measurements and calculations will be required to drive special metal pins (crutches) into the wall. The gutter will be mounted on them by means of studs, which will need to be adjusted in height.
Combination brackets or long hooks can also be installed:
- on the roofing, if a metal tile or ondulin was used to cover the roof, since in such cases the step between the rafters exceeds 600 mm and fastening to them will not provide sufficient reliability of the fixation of the system;
- at the bottom of a continuous flooring, if the soft roof was covered with shingles.
With regard to the selection of clamps, there is a choice between plastic, equipped with two mounting points, and metal, for fixing which you will need one hardware. The selection of clamps is based on the mandatory fulfillment of the following requirements:
- to the depth of fixation. The depth of fixation of the hardware is considered to be sufficient 50 mm, but practitioners suggest that it is better to play it safe and set it at least 70 mm .;
- the lack of penetration of hardware into the layer of insulating material, because in this case, the reliability of fastening is sharply reduced and cannot ensure the safety of the functioning of the system as a whole;
- to the presence of a distance between the drainpipe and the wall of 300-800 mm;
- to the presence of a minimum clearance, about a millimeter, between the clamp and the pipe.

When installing a clamp or bracket, you need to leave a small gap between the fasteners and the pipe
Important! The presence of a gap is provided in case of temperature deformation of the drainpipes, which is especially true for plastic structures. If the clamp is too tightly wrapped around the pipe surface at temperature extremes, cracks may appear on it.
Fixing a drainpipe to a wall when laying a drain from top to bottom
As a rule, drainpipes are mounted from top to bottom with the installation of a bend, coupler and drain upward with a bell. The installation sequence is as follows:
- It is determined where the upper bracket will be fixed. The calculation takes into account the width of the overhang of the roof cornice and the size of the pipe bend.When the drain funnel is taken out at a considerable distance from the wall, it is worth resorting to the use of a bend on the drain pipe, which allows it to be brought closer to the wall. To perform a bend, you can use a shaped element (elbow with a certain angle) or a short length of pipe.
- Having installed the upper bracket, a vertical line is marked with a plumb line, during which markings are made for the installation of other fasteners for fixing the drainpipe. The estimated distance between the fasteners is about 1000 mm.
- Upon completion of the placement of the brackets, a branch is mounted that provides the supply of water coming from the gutter, passing the drainage funnel, into the drain pipe.
- Having brought the upper end of the drainpipe into the curly part, expose it vertically with a plumb line and attach it to the wall with clamps. One of the fasteners is considered as fixing, the others as guides. Manufacturers of some drainage systems strongly recommend the use of clamps - compensators for thermal expansion. The clamp is mounted under the connector where the subsequent pipe is led.
- At the lower end of the pipe fixed by means of pipe clamps, a drain bend is installed. In this case, from the lower edge to the blind area, the distance will be 250-300 mm. In the presence of a drainage system or stormwater inlet, the lower end of the drainpipe is led there directly.

As a rule, installation of a drainpipe is made from top to bottom
Fastening the gutter pipe to the wall when laying from the bottom up
When attaching a drainpipe, in most cases, an installation option from above is considered, sometimes as the only possible one. However, many masters also use the installation option, starting from the bottom. The same option is proposed in the instructions of individual manufacturers of drains.
Installation of a drainpipe begins with the installation of fasteners in the wall - brackets or pins. The markup work is carried out in the following order:
- The lower clamp (or two lower clamps) is used to mount the drain bend or mark (pipe section with a cut angle).
Note! When there is a drainage system or a drain inlet, then there is no need for a drain bend or mark, it will be replaced by a regular pipe, brought into an existing water collector.
- When installing subsequent links, a clamp is provided on each of them. When the length of the link of the drainpipe exceeds two meters, care should be taken about an additional fastener in its middle part. The optimum is the distance between the clamps, not exceeding 1800 mm.
- The distance between the top of the drainpipe and the nearest gutter mount must not exceed 150 mm.
In the case of the purchase of a ready-made kit of the drainage system, not only all the elements necessary for its installation, but also a detailed guide will be available at the user's hands, which will help you to find out how to properly install the whole installation and fasten the drainpipes to the walls, in particular.
In order to attach a drain pipe to the wall, it is not necessary to have professional skills and sophisticated tools. The work may well be carried out independently, provided that the instructions are carefully followed. It is not worth neglecting the instructions, because they are developed on the basis of practice, when reliable operation of the system for a long time is paramount. Proper implementation of the fastening and other works allows us to calculate that the drain will last at least twelve to fifteen years.