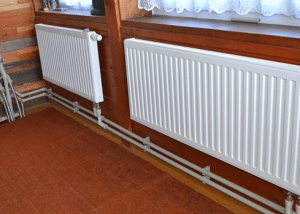
Underfloor heating is an alternative to radiators, which for many years have been considered as the only source of heat suitable for installation in a living room. Such a system makes life more comfortable. It can work both on electricity and using the energy of hot water. According to experts, the second option is most preferable. Currently, the most popular is a warm floor made of polypropylene pipes.

Due to the properties of polypropylene, a warm floor made of such a material will be reliable and durable.
Content
Material Features
Polypropylene pipes are widely used to create engineering systems for various purposes:
- water supply;
- heating;
- drainage.
The technical characteristics of polypropylene allow laying pipes made from it in open form, in soils of any type, in channels, under plaster in the walls, etc.
Of their main advantages, the following points should be highlighted:
- Joint tightness. This property of the polypropylene pipeline is ensured by the use of special welding technology. soldering iron. Moreover, the duration of this procedure takes only a few minutes, and use this a tool very simple.
- Mechanical strength combined with elasticity. Due to this property, these products are very frost-resistant. Even if the water present in the pipe freezes, it will expand without violating the integrity of its structure. When the liquid melts, the pipeline will take its original shape.
- Durability. At a system pressure of 7.5 atmospheres and a working fluid temperature of about + 75 ° C, a polypropylene pipe without repair will last at least 25 years.
- Affordable price. The cost of polypropylene pipes is lower than other types of products of this type. This is especially true of the connecting elements.

The installation technology of polypropylene pipes allows you to get a connection that is particularly durable and tight
Advice! This polymer is characterized by a high coefficient of thermal expansion. With this in mind, when creating a warm floor from polypropylene pipes with your own hands under the screed, use products reinforced with aluminum or fiberglass.
Alternatives to Polypropylene
Modern enterprises have mastered the production of other inexpensive materials suitable for use in heating systems. In particular, for the organization of a heated floor, pipes made of cross-linked polyethylene can be used.
More recently, the definition of "stitched" caused a wave of rejection among builders, as it was associated with a not very strong structure, on which there is a longitudinal seam. However, these products are not sewn together in parts, tubes or sheets, but in molecules. The structure of the "crosslinked" polyethylene looks like a three-dimensional network with strong bonds formed from the links of the molecules of this polymer.
In addition to good strength, compared with polypropylene pipes for underfloor heating, “cross-linked” polyethylene pipes expand less when exposed to high temperature.
Among the popular options is also the use of metal-plastic products. But there are some nuances. It:
- high price;
- the appearance of scale. The formation of solid deposits usually occurs inside the pipes at the threaded joints of the fittings.
In view of the foregoing, in order to create a warm floor it is more expedient to choose polypropylene reinforced or polyethylene pipes.

For a warm floor, metal-plastic pipes can also be used, but this option will be more expensive
Preparatory work
During the preparatory work, it is necessary to take into account all the little things that directly or indirectly subsequently can affect the efficiency of the structure. In particular, in order for the warm floor from polypropylene pipes to warm the air in the room, and not the base located under the system, it is necessary to make thermal insulation. Do it yourself in several stages:
- put a layer of waterproofing on the rough screed. For this, a thick plastic film is suitable. When performing work in a private house, wrap it on a wall 100 millimeters. So you limit the penetration of moisture on the elements of the warm floor rising from the ground.
- the next stage is the laying of heat-insulating material. As such, in most cases, extruded polystyrene foam is used. Install in a checkerboard pattern. Slots may form at the joints of the slabs with an uneven rough screed. You can fill them with mounting foam. Perform the same operation with gaps between the expanded polystyrene plates and the wall.
Advice! To improve the quality of insulation, lay on top of penofol. This material is made of foamed polyethylene. A layer of aluminum foil is placed on one of its sides. Thanks to reflection, thermal energy rises and warms the air in the room.

Before laying pipes, it is necessary to cover the floor with a layer of insulating material
Installation of underfloor heating
The consumption of pipe material largely depends on how the heating circuit is laid - “snail” or “snake”. The recommended DIY wiring diagram for polypropylene pipes is the “snail”. It demonstrates the high efficiency of the underfloor heating. But implementing such a scheme is a bit more complicated.
To calculate the required number of pipes for a certain step of the loop, you can use the data from the table.
Table 1
| Step, millimeters | Pipe consumption in meters per 1 m2 |
| 300 | 3,4 |
| 250 | 4,0 |
| 200 | 5,0 |
| 150 | 6,7 |
| 100 | 10,0 |
One way or another, the system will differ in irregular geometric shape, consisting of a large number of turns and bends with different radii. Therefore, accurately calculating the required footage of the pipe is very problematic.

To calculate the amount of material, you can mark the future system on the floor and measure it
The way out is seen in the application of one of two methods:
- the use of a long thread;
- creating a project on a graph paper sheet.
In the latter case, you will have to spend more time. To do this, you must:
- transfer the plan of the heated room to paper;
- draw the heating wiring with polypropylene pipes.
- measure the resulting "snake" or "snail" with a curvimeter or a ruler. The resulting figure will correspond to the required pipe length.
Using a strong rope is much easier. It is enough to stretch it at the place of the proposed pipe laying and then measure the length. Regardless of the method chosen, it is necessary to take into account a possible overrun. To do this, add 10% to the calculated length.
The wiring of underfloor heating from polypropylene pipes with their own hands according to the "snail" scheme involves parallel laying of the supply and return pipes. At the same time, the procedure of material bending is significantly simplified. For fastening pipes, plastic clips or special metal clamps are used. Fixing the fasteners to the screed is done with dowels through a layer of thermal insulation.
There is another way to fix the pipes of a warm water floor - to the reinforcing mesh.This is a more rational option, since the installation is much more uniform, and the strength of the screed is increased. You can fix the pipes with wire or plastic clamps, however, the use of brackets will speed up the installation.
It is better to lay a warm propylene floor from a coil or a roll. This approach will ensure a minimum number of connections and save not only time but also money. Fasteners must be placed at a distance of 80 cm from each other. Do not over tighten the clamps as linear expansion will cause the pipe to deform.

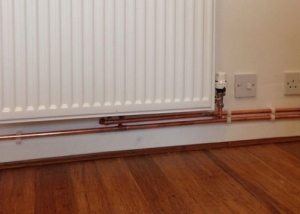
You can fix the pipe to the floor with the help of special clips, which must be placed evenly through equal distances
Important! The room will be evenly heated with a length of one circuit not more than 80 meters, ideally about 50 meters.
It is recommended to use segments of approximately the same length, and their number should correspond to the number of outputs on the collector. Pipes should be purchased taking into account their linear expansion and the required power. The standard indicator is a diameter of 2cm. When buying polypropylene pipes for underfloor heating, pay special attention to their quality, because you plan to use the system for more than one year.
Having laid the trunk, check the quality of the connections present in it. If everything is in order, proceed with the installation of the collector.
Purpose of the collector and its installation
This device is responsible for setting up and adjusting the “warm floor” system. The simplest manifold is equipped with shut-off valves only. Such a technical solution significantly reduces the cost of the system, but the possibility of setting it up with your own hands is almost completely absent. In more expensive versions, control valves are provided. They provide the opportunity to adjust the flow rate for each circuit individually. Although the increase in cost will be noticeable, you can adjust the warm floor so that all rooms are heated evenly.
The collector should be installed in a special box with a wall thickness of 12 cm. When selecting its dimensions, the dimensions of the collector group are taken into account, including all necessary additions in the form of drains, ducts and pressure sensors. Place the box above the level of the warm floor so that the pipes do not extend upward from it. This will ensure the full operation of the air exhaust system.

To adjust the operation of the warm floor, a collector is required
The final stage of installation
Assembly and filling of the collector cabinet must be carried out in accordance with the instructions included in the package of supporting documents for the collector. In general, the scheme for performing these works is as follows:
- Connection of all circuits to the collector system. The fastening of one end is carried out in the feed header, and the other in the opposite.
- After that, you need to make sure the system is working. To do this, fill each circuit separately with water. For air to completely leave the cavity of the warm floor, all valves and taps must be open.
- Pump water under pressure, the value of which exceeds the operating indicator by one and a half times, but not less than 6 bar.
- After half an hour, raise the pressure to the previous level if it drops. This procedure should be done 3 times.
- Then leave the system for 24 hours. Do-it-yourself installation can be considered completed correctly if the pressure drop per day does not exceed 2 bar.
After this, it is necessary to perform a cement screed.
Advice! To improve its quality, add a plasticizer to the solution.
The installation of flooring can be started no earlier than after 28 days. This is the minimum term for the full formation of the screed.
In general, the process of installing a warm water floor is not difficult to call. To perform it correctly, you need to purchase a set of equipment, as well as all the tools.And, of course, follow the sequence of actions.