The chimney canopy is a special device that is mounted on the chimney and is not only an ornament, but also an important component of the chimney. This device performs a number of important functions, including: proper removal of combustion products, protection of the pipe channel from atmospheric precipitation, as well as from various debris entering the pipe. Proper installation of the visor increases traction in the system, which affects the efficiency of the system as a whole.

The chimney hood is a protective structure that is considered mandatory for each type of pipe
Content
Purpose and device
A visor to the chimney enhances draft performance in the structure. This is due to the deviation of air flow. In addition, such a device can be equipped with a grid, which eliminates the ingress of debris into the system. Consider other features of this device:
- the chimney, covered with a visor, is protected from rain and snow;
- presentable appearance of the chimney on the roof;
- increase in the efficiency of the chimney by about 10–20% (if installed correctly);
- Strengthening the brickwork of the chimney.
Important! It is also worth noting that such a simple device, like a peak on the chimney, eliminates turbulence or air turbulence in the chimney. This is very important, because if turbulence occurs, the smoke in the system can change direction. As a result, he will fall into the living room, and not be diverted outside the house.
The peak is a necessary element of any chimney design. Installation of this device is recommended in all cases, regardless of the individual design features.
Design elements of a peak on a chimney
The fungus on the pipe is a device that resembles an umbrella or canopy and is mounted on the head of the pipe. This device also has other names, for example, a flygar. Today, there are countless options for visors on the pipe, depending on the appearance. The variety of forms is primarily aesthetic in nature, since the principle of operation of all flyugars is the same. Consider the main structural elements that are part of the fly barrel:
- Protective cap. This element can have a different shape: a cone, a pyramid, or more complex, multifaceted options. A protective cap protects the chimney channel from moisture and debris, as well as birds.
- Apron. Girdles the cap and protects the tip of the pipe from rain. Thus, we can say that the apron prevents the appearance of corrosive areas on the chimney pipe. In addition, the apron protects the pipe from the occurrence of fungus as a result of moisture, which increases the life of the chimney as a whole.
- Brackets. Fasteners, which are represented by plates of sheet metal. Brackets are used to fix the cap with an apron. The number of brackets depends on the design features of the chimney and the hood itself. Fixation is usually carried out using welding equipment.

The visor consists of a cover, an apron and a special mesh that can perform the functions of a spark arrester
To make an umbrella with your own hands, which will last a long time, you need to pick up a sheet of metal that has anti-corrosion properties. Most often, galvanized steel is chosen for these purposes, which is characterized by high resistance to corrosion.
Principles of Operation and Functions
Chimney nozzles are quite simple devices that, moreover, perform very important functions. Do not forget that increased traction contributes to smoke removal.
The process itself occurs in this way: the air flow is divided into a hood and enters the channel, which causes a “suction” effect. As a result of this, a zone is formed, characterized by reduced pressure. Following the laws of physics, smoke from a chimney rushes into this zone. It is worth noting that the air flow can be horizontal or move at an angle.
Also a protective visor reduces the risk of fire. For better efficiency, you can equip the visor with a special grid - a spark arrester. And deflectors with turbines, which can be part of protective umbrellas, are able to provide normal traction regardless of the design of the chimney.
Helpful information! The most convenient option for the visor on the pipe is a device with a hinged lid. This is due to the fact that for a routine inspection or cleaning the visor it does not need to be removed, but rather it is enough to open the cover and perform all necessary manipulations.

The visor can be supplemented with a device that increases draft in the chimney
All of the above features allow this device to be incredibly popular in today's market. In general, the visor worn on the chimney can be called a symbiosis of simplicity and efficiency.
Varieties of visors
Today you can find chimneys that have the most diverse shapes and sizes, so manufacturers who produce visors try to diversify the range of these products as much as possible. Consider the most common varieties of peaks on the chimney pipe, which can be found in almost any hardware store:
- Standard visor. Such a visor is represented by an umbrella having a pyramidal shape. Such a device is made, as a rule, from a metal sheet and is connected to the drip apron by means of brackets.
- Four-slope nozzle. The design of this kind of visor resembles a hip four-sloped roof. Most often, such a model is mounted on a chimney, consisting of bricks and characterized by a rectangular shape.
- Visor with a semicircular umbrella. Due to its design, such a model is most often installed on the roofs of houses made in the European style. However, the effectiveness of such a device is quite small.
- Flat visor. This variety is different in that it has a flat canopy in the form of a rectangle. Mounted flat visors on the roofs of houses, made in the style of minimalism. It is worth noting that the design features of a flat device affect the load experienced by the brackets in the winter. This is due to the fact that snow does not roll off the structure, but, on the contrary, accumulates on it.
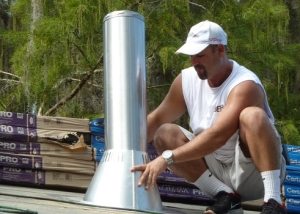
- Round device with a cone-shaped umbrella. They are used for round chimneys and, as a rule, do not have a drip.

On the chimney with a circular cross section, you can install the simplest device in the form of a fungus
Materials of manufacture
Before you study the steps that tell you how to make a visor on the chimney pipes, you need to familiarize yourself with the materials necessary for this process, and also calculate their correct amount. Consider the list of materials that will be needed to assemble the fungus on the chimney pipe with your own hands:
- the most popular metal for manufacturing a visor to the chimney is galvanized steel, which has high strength characteristics and resistance to corrosion;
- the second most popular material for making a visor for a chimney is stainless steel. Stainless steel, like galvanizing, is resistant to corrosion, high temperatures and has good strength;
- in addition, copper is often used for the manufacture of fly cards. This material is more expensive, however, from an aesthetic point of view, it looks more attractive.
If galvanizing was chosen for the manufacture of the visor for the chimney, it is recommended to purchase a sheet of this material up to 0.8 mm thick. If desired, you can purchase a sheet with a thickness above 0.8 mm, however, such a sheet will be difficult to process. After the first months of operation of the galvanized visor, it usually dims, but there is nothing to worry about. The service life of galvanized steel flycars can reach up to 20 years, and in some cases more. If you do not want the shade of the visor material to fade over time, it is recommended to purchase material that has a powder coating. However, it is worth noting that the price of such material is slightly higher.
Note! There are many auxiliary elements that are supplied with windshields. Among these elements are: dampers, hinged covers, etc. Experts recommend that when choosing this device, first of all, pay attention to efficiency, and only then - to design. In addition, an improperly selected shape is the cause of noise and vibration in the chimney.

In order for the visor to serve for a long time, it must be made of metals not susceptible to corrosion or coated with a paint
In any case, the selection of material from which the visor will be made depends on the owner of the house. The main thing that you need to remember is that it is best not to save on material, since low-quality options will quickly fail, and repairing or completely replacing a windshield is accompanied by some inconvenience due to the location of the device.
Do-it-yourself visor to the chimney
So how do you make a visor on the chimney with your own hands? Before proceeding with the manufacture of the fungus for the chimney, it is necessary to familiarize yourself with the list of tools and materials that will be required during the assembly of the device. Consider the basic materials and tools that will be needed to assemble the chimney visor with your own hands:
- protective gloves;
- ordinary hammer;
- rubber mallet;
- clamps;
- bends;
- cardboard (for a pattern);
- corner (preferably metal);
- a bar made of metal;
- rivets;
- scissors for metal;
- ruler or tape measure;
- marker for marking.
In addition, a very important point is the preparation of the corresponding drawing. Drawing a visor on a chimney, assembled by yourself, is necessary in order to calculate in advance the material costs, dimensions, cutting angles of the metal sheet, etc. If necessary, a variety of drawings can be easily found on the Internet. On the Internet you can find a wide variety of drawings of peaks on the chimney pipe for DIY assembly.

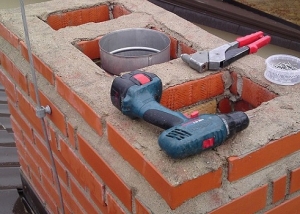
A simple “fungus” can be quickly made with your own hands, but for a more complex design you will need special equipment
When assembling the visor on the chimney pipe with your own hands, it is recommended that you choose the simplest models so that during the manufacture of this device you avoid any difficulties. Consider the process of manufacturing a visor to the chimney in stages:
- First of all, it is necessary to take the corresponding measurements from the chimney. To do this, you need a ruler or building tape measure.
- At the second stage, it is necessary to cut out all future elements of the fly lamp from cardboard (creating a pattern). Experts recommend adding 4–5 mm to the size of the chimney.This is necessary in order for the future flyugar to be freely put on the chimney pipe.
- At the third stage, it is necessary to transfer the dimensions from the cardboard pattern to the metal sheet. To do this, you need the most ordinary marker, then you need to cut blanks from a sheet using scissors for metal.
- Next, you need to bend the lines marked in the drawing to a right angle. This will require bending. Then you need to bend the lines that are assigned the letter "d". In the place of joining, it is absolutely necessary to make 3 holes with a pitch of about 15 cm and fasten the resulting pyramidal peak with rivets.
- After the main work on the implementation of the visor behind, you can proceed to the pattern of the apron. To begin with, as in the previous case, we transfer the necessary dimensions to cardboard, and then to the metal sheet. Next, you need to perform the folds and fasten them with rivets.
- At this stage, the locking brackets are made. To do this, cut 4 metal strips of the same length and use welding equipment to connect them to the umbrella structure.
- A special coating is applied to the finished visor, which will ensure the resistance of the structure to corrosion.
- After drying, the visor is put on the chimney.
Advice! Experts recommend dyeing the resulting fungus with paint (it is best to apply 2 layers).
Making a fly vane with your own hands is a fairly simple process, if you approach it with all seriousness (make measurements, drawing, etc.). If necessary, the visor can always be purchased at a specialized store.